-

Getting Started 14
-

Maintenance 14
-

Troubleshooting 14
-

Repair 8
-

Laser 101 3
-

Materials 10
-

Accessories 20
-

Multi-Roller 7
-

LightBurn 9
Replace MIRA 40V Power Supply

☠️ WARNING ☠️ Turn OFF and UNPLUG the machine before starting.
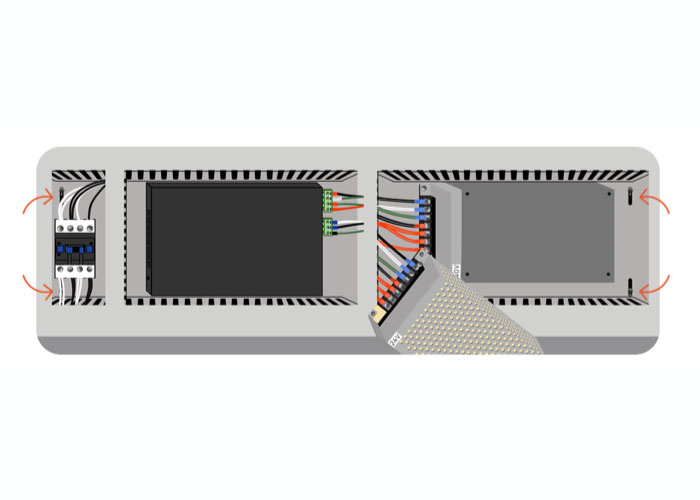
- Open the lower left side panel with the cabinet key, and locate the 40V power supply, situated behind the 24V power supply.
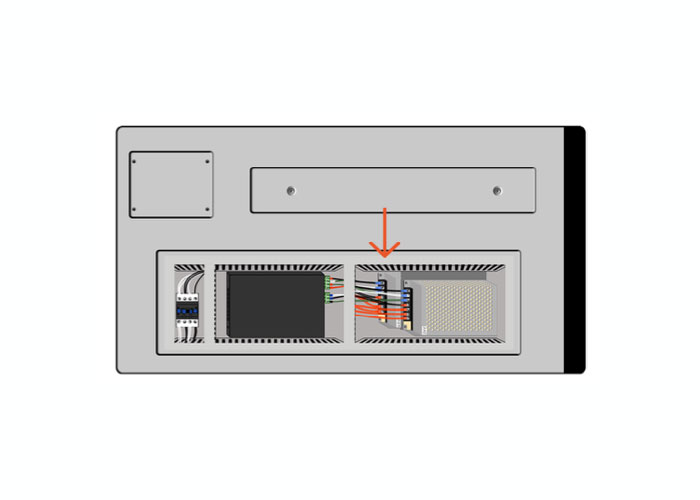
Side of machine - Use an Allen wrench to remove the mounting bolt in the lower left corner and the top right corner, and gently hang the unit to one side.
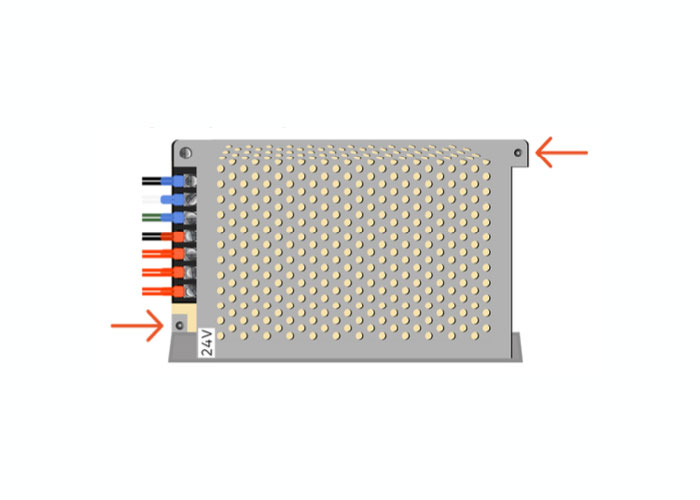
24V power supply - Take a picture of the wiring connections on the 40V power supply, to reference during reinstallation.
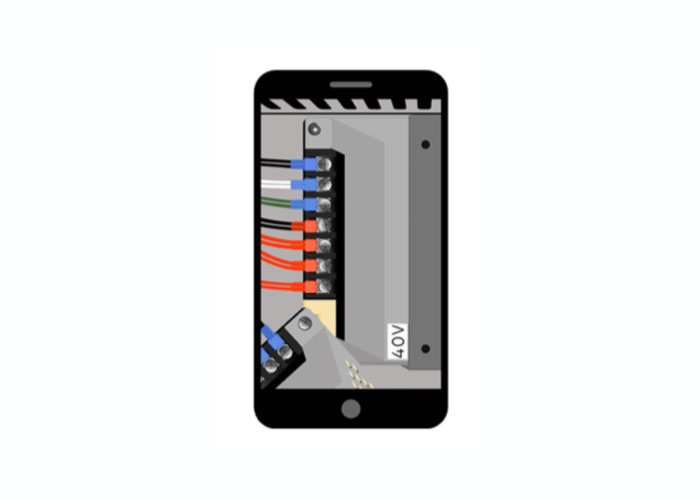
Photo of 40V power supply - Use a phillips-head screwdriver to loosen wire terminals and remove wires.
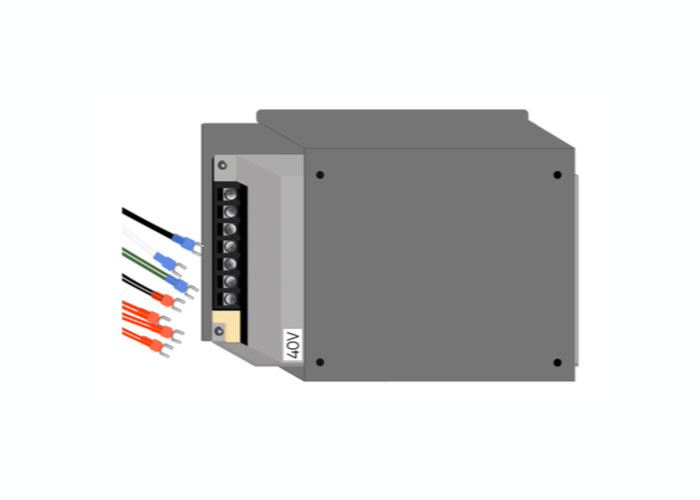
40V power supply - Use a 5/16 nut driver to remove the 4 nuts holding the interior panel of the machine in place.
Interior panel of the machine - Pull the panel towards the edge of the cabinet and lower it to the floor of the machine.
- Remove the 4 screws holding the 24V mounting bracket in place.
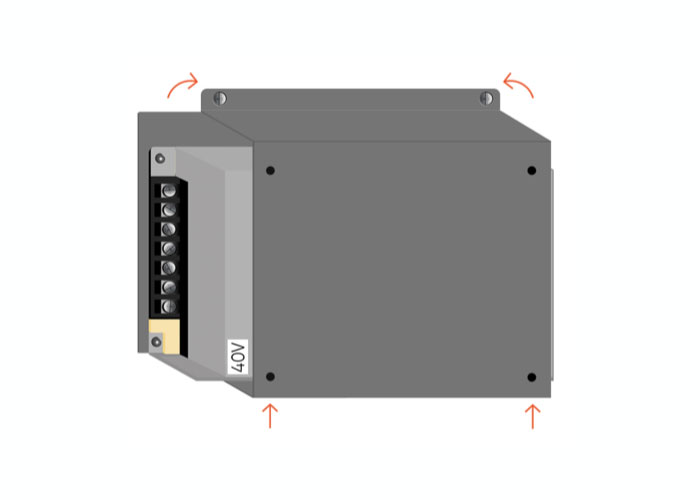
Mounting bracket - Unscrew the 4 bolts holding the 40V power supply in place, and remove.
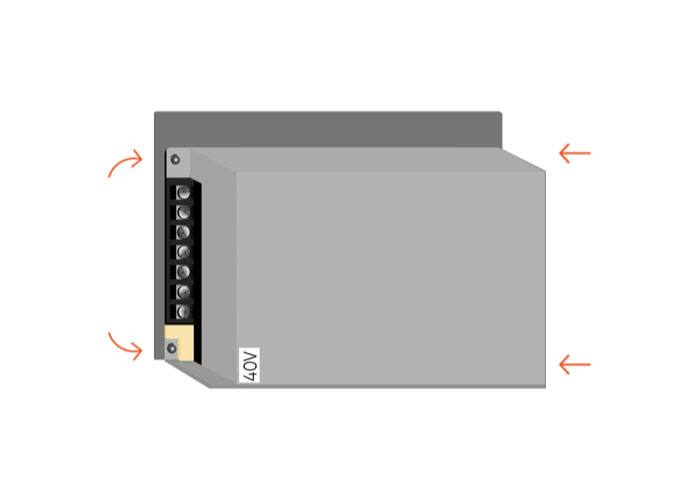
4 bolts holding the 40V power supply in place - Make sure that the red switch on the new power supply is set to 115V, then install.
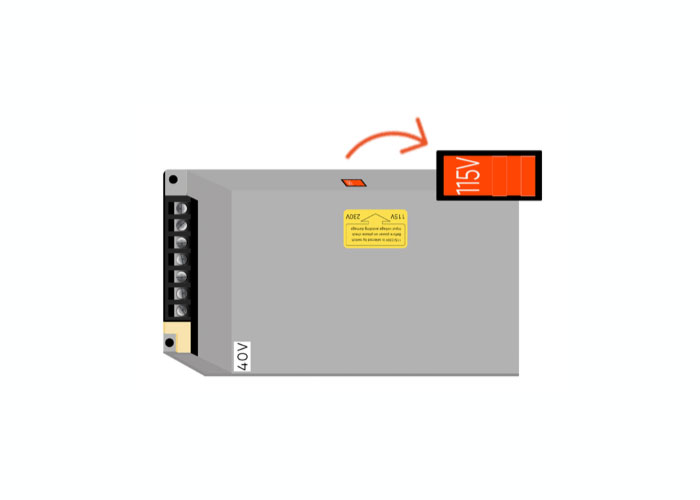
Red switch on the new power supply set to 115V - Reinstall all parts in reverse order. Close and lock the panel.
If you have any questions or if your laser is malfunctioning, please contact the manufacturer directly to get help or submit a support ticket.
Did you find this document helpful? Let us know what you liked or what we can improve on by sending an email to helpusgrow@emplaser.com.


